For the next 3 months, starting on Monday the July 22nd and ending on October 21rst, I will be releasing a new pattern every week.
I will have previews for each pattern the Wednesday before they are released and if you act soon you will be able to buy a "Pattern of the Week" subscription. This gives you all 15 patterns for only half the price, plus other awesome goodies. Check it out over at my Etsy shop!
Monday, July 15, 2013
Today is going to be the best day ever!
My good friends and neighbors are back from their vacation in France, my sweet little Lil is back from a week at summer camp and I am back home from a weekend with family and friends in my very hot home town. I woke up this morning to the crisp coastal air with a renewed sense of passion for life and all the aspects that come with it. I was lucky enough to find a passion in sewing, especially in soft toy making and I am more determined then ever to share that passion. I am hoping this new video tutorial series that I will be introducing tomorrow will help inspire all of you to try something new and take some control of your children's playtime.
I was playing around with new fabrics when this little monster was born.
As a parent I try to be as aware as possible. I like knowing where our food comes from, what I can't grow I like to get a local farmers markets. I also try to repurpose or make most of out clothing, if not just for the economics of it I like knowing that I had a major hand in what they put on and in their body. I know many of you are the same way, but it wasn't to long ago that I found myself falling short with the very things that help shape their little minds, toys. My house was littered with cheap plastic toys that would fall apart after one use, often made from mysterious materials from far away and rarely had any positive nurturing aspects. It was sometime in 2010 when I made my first cloth doll and I was hooked.
I've made my fair share of "boo-boos", but I've learned so much along the way and I want to share that knowledge and the joy of knowing that you created your child's first best friend.
Today and everyday will the best days ever, even on the bad ones, making something with a smile can turn it completely around.
This is "Blu" he is a favorite around this house, he has a way to always put a smile on even the grumpiest of faces.
Wednesday, July 10, 2013
A little house cleaning and some new arrivals.
I've been doing some house cleaning lately and I realized that I have far to many sweet little toys sitting un-played with in my studio. I decided to put a few of them up for adoption in my Etsy shop. Siobhan, Seamus, Booger and Hopper are there now, waiting for their new home, with penny shipping for domestic orders.
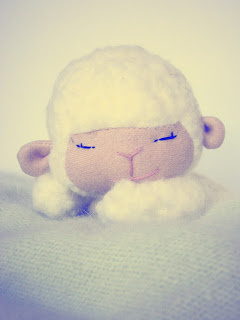
The newest arrival to the NimblePhish pattern family is this sweet little lamb:
Her pattern will come with 3 other friends and will be releasing tomorrow 7/11.
The newest arrival to the NimblePhish pattern family is this sweet little lamb:
Her pattern will come with 3 other friends and will be releasing tomorrow 7/11.
Tuesday, July 9, 2013
Making Sleepy Eyes
Welcome to the first of my new weekly "Tutorial and Tips" series. I'm still pretty inexperienced with blogging, but I want to be able to share more about myself and what I have learned on my self taught creative path.
Next to Norbert is an Elmer's "Craft Bond, Extra Strength" glue stick. You need to use this or the "Extreme" glue stick because they will create a strong wash resistant bond, normal glue will just wash away. I also prefer a stick to a liquid glue because it has very little to any mess.

I like to use my thumb to measure the eyelid, just cut around it does not need to be perfect.

Check the sizing before you add the glue, as you can this eyelid is a little to big. Trim away the extra, but make sure you don't trim to much. It's better to have a little to much then not enough.
Get that glue on to the back of the eyelid.
Place on your creatures eye.
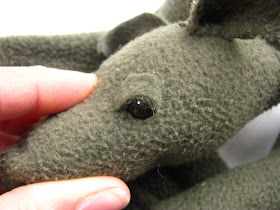
Smooth the eyelid out over the curve of the eye, be sure you get it all the way back so the fabric connects. If you have sewn on or button eyes you can tuck it behind. While the glue is still new move the eyelid around until it get an expression you like.
There you have it some personality packed sleepy eyelids!
I realized very quickly that hand embroidering eyes was not my strong point, it took (and still takes) me forever to get the perfect eye. I decided to plastic eyes and it was a great fit, but something wasn't quite right, they lacked that little extra bit of personality. The sleepy eyelid was the solution and it took quite a bit of trial and error to get it just right, but we'll skip that part and show you what I do now.
This is Norbert, he's my Lil's best buddy and I am charged with fixing him while she's at camp. Her little brother decided he was in a destructive mood and peeled off his eyelids.
Next to Norbert is an Elmer's "Craft Bond, Extra Strength" glue stick. You need to use this or the "Extreme" glue stick because they will create a strong wash resistant bond, normal glue will just wash away. I also prefer a stick to a liquid glue because it has very little to any mess.

I like to use my thumb to measure the eyelid, just cut around it does not need to be perfect.

Check the sizing before you add the glue, as you can this eyelid is a little to big. Trim away the extra, but make sure you don't trim to much. It's better to have a little to much then not enough.
Get that glue on to the back of the eyelid.
Place on your creatures eye.
Smooth the eyelid out over the curve of the eye, be sure you get it all the way back so the fabric connects. If you have sewn on or button eyes you can tuck it behind. While the glue is still new move the eyelid around until it get an expression you like.
There you have it some personality packed sleepy eyelids!
I hope you found this helpful. Come back for more tips and tricks, along with some peeks inside the creative chaos I call home.
Thank You
Naomi


